
I’ll never forget the very first time I undertook a bathroom remodel in my own home. I said to myself, “It’s just a small room how difficult could it be?” Well, let me tell you, it taught me some of the most valuable lessons regarding design, planning, and making a room both beautiful and functional.
From selecting tiles and selecting fixtures to navigating challenging layouts, I learned that bathroom design is an art and one that can totally transform how you feel about your home.
In this article, I’m sharing the most important things I learned, along with real-life examples and practical tips, to assist you in designing a bathroom that you love.
Why Bathroom Design Matters
We spend more time in the bathroom than we even know it’s the spot where we begin and end our day. A well-designed bathroom not only brings comfort, but can also add value to your home and improve its energy efficiency.
Good bathroom design, however, isn’t just a matter of choosing pretty tile. It’s about finding harmony among beauty, function, and flow.
Start With a Clear Plan
My Experience: Sketching It Out Saved Me
When I initially began, I got it wrong by going out immediately to shop for faucets and mirrors without planning. Huge error! I had to return half of what I purchased because it didn’t accommodate the layout.
What did work was drawing up a floor plan and double measuring everything. Even if you’re only updating a vanity or installing shelves, having the exact space that you’re working with can save you money and time.
In a guest bathroom that was tiny, we took our measurements and knew that an oversized vanity would be too cramped for the room. We instead used a slim, wall-mounted sink that allowed space for a tiny storage shelf below. It immediately made the area appear larger.
Select Materials That Resist Moisture
I used to fall in love with a gorgeous wood-trimmed mirror for the bathroom and see it warp after half a year due to all the moisture. Lesson learned: always choose bathroom-friendly materials.
For walls, I now always insist on ceramic or porcelain tiles since they are so good with moisture. For flooring, I have used luxury vinyl tile (LVT) in many remodels, and it stands up wonderfully even to heavy use in family bathrooms.
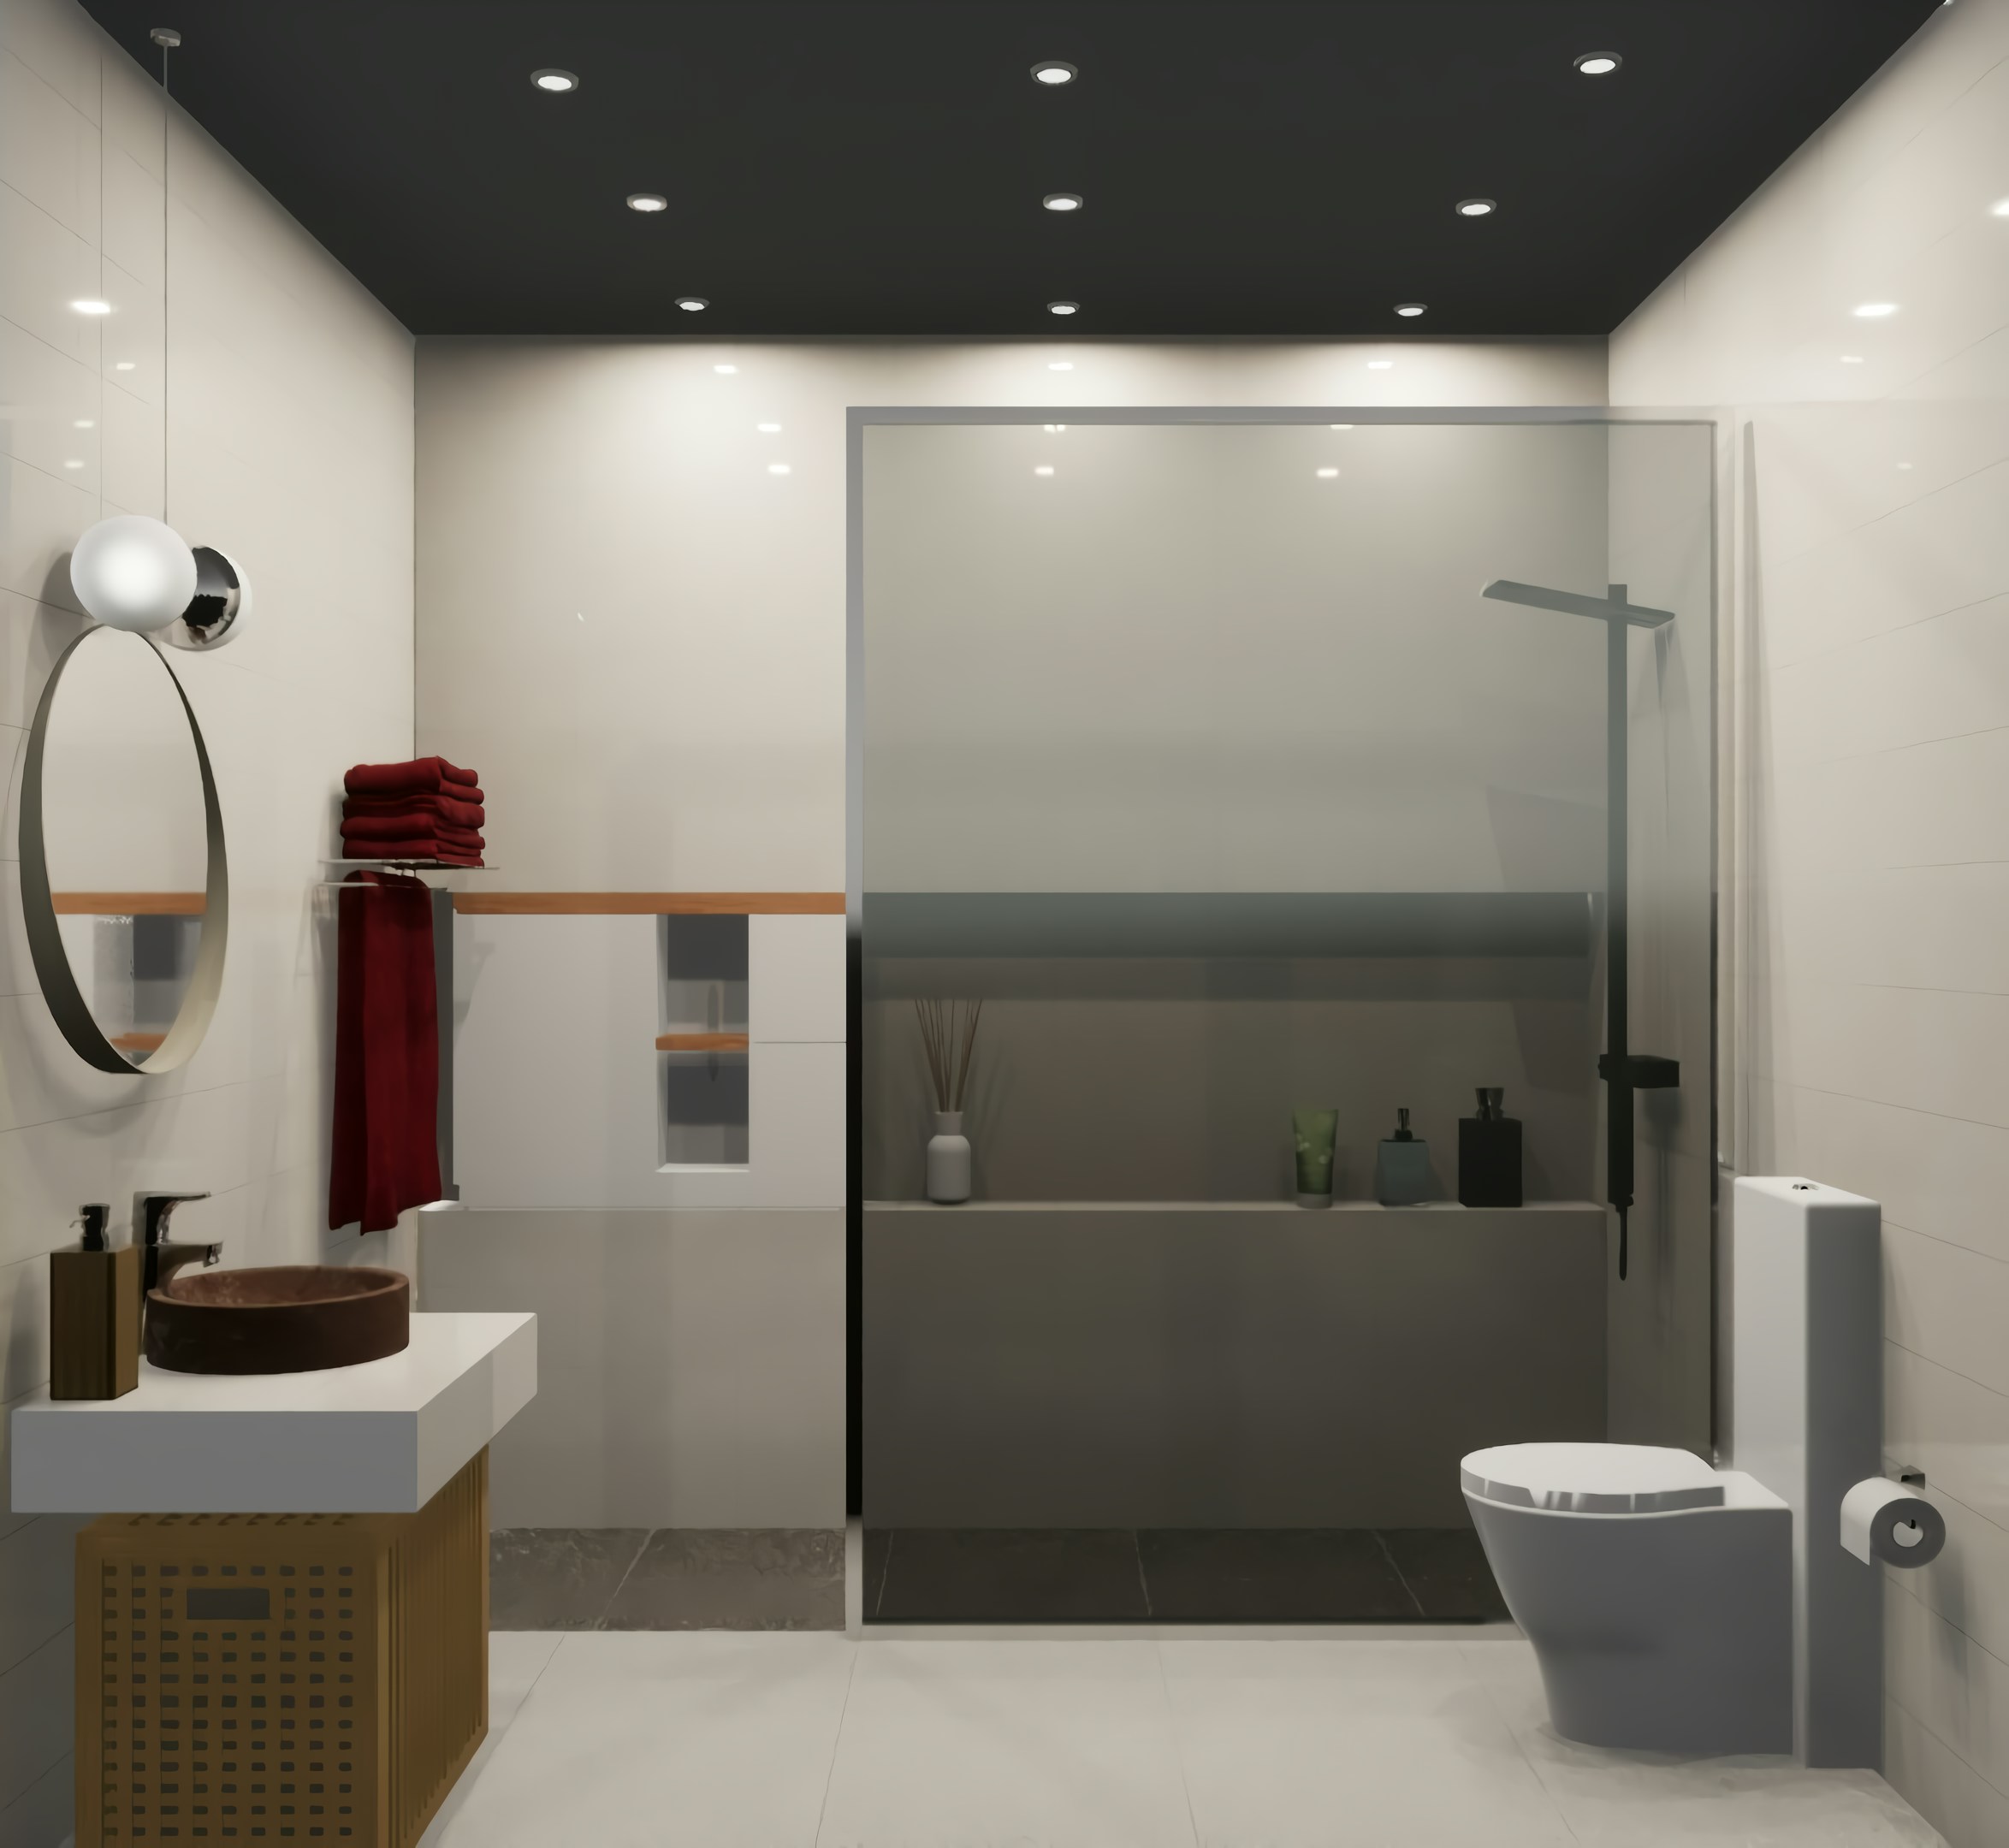
Lighting Makes or Breaks the Space
In my initial renovation, I put in one ceiling light and immediately regretted it. The room felt flat, and the mirror area was dimly lit.
Now, I always advise layered lighting:
An overhead light for overall brightness
Wall sconces or vanity lights for task lighting (so you don’t have shadows on your face)
Accent lighting if you want to emphasize beautiful tile work or art
In a recent renovation, we put in LED strip lighting underneath the floating vanity. Not only did it look great, but it also served as a gentle night light ideal for midnight bathroom runs without blinding yourself.
Storage: Think Vertical
One of the biggest annoyances for me was never having enough space for toiletries, towels, or cleaning materials. The answer? Go vertical.
We put in recessed shelves within the shower, a medicine cabinet mirror over the sink, and even floating shelves over the toilet. These little touches made a gigantic impact, and they did not need to involve knocking down walls or opening up the space.
Add Personal Touches
Initially, I was so concerned with resale that I made a “safe” bathroom with neutral colors, plain fixtures, no character. It was… adequate. It didn’t feel like me though.
On my second remodel, I threw in a bold accent wall in dark blue tiles and some beautiful framed artwork that spoke to me. Instantly, the room came alive and felt personal.
One of the clients selected a playful patterned floor tile, which gave charm and personality to a plain powder room and made it a statement room. Don’t be shy to show your personality!
Step-by-Step: How to Plan Your Bathroom Remodel
Step 1: Set Your Budget
Before you lift anything, determine how much you can afford. Include:
Fixtures and materials
Labor charges (if you’re hiring professionals)
Unexpected expenses (always have 10–15% extra for surprises)
Step 2: Define Your Goals
Ask yourself:
Do you need more storage?
Are you upgrading to resell?
Do you require improved lighting or design? Understanding your objectives will inform every decision.
Step 3: Make a Mood Board
Take inspiration from Pinterest, home decor magazines, or home improvement websites. This will keep you on track and prevent impulse buys.
Step 4: Measure and Make a Floor Plan
Even if you’re not relocating walls, having the precise layout will enable you to select fixtures that will fit.
Step 5: Pick Fixtures and Materials Wisely
Pay attention to moisture-resistant, long-lasting, and classic materials. Always read reviews prior to purchasing.
Step 6: Determine What to Do Yourself (and When to Call in the Experts)
Basic tasks such as painting or hardware replacement can be DIYs. For plumbing, electrical work, or substantial tile installations, I would suggest calling a professional.
It’s easy to feel overwhelmed when designing a bathroom, but it’s also one of the most gratifying projects you’ll ever work on. It requires thoughtful planning, savvy material selection, and some personal flair, and you can create a room that’s not only practical but one you adore.
Speaking from experience, even the smallest design updates can transform your daily routine. So don’t be afraid to dream big, plan well, and start creating a bathroom that makes you happy every single day.
Get a Free Quote Today
You don’t have to make this decision alone. A professional inspection and free quote can help you figure out the best path forward.
Click below to get a free quote. It’s quick, easy, and can save you from costly surprises later.